Your coil packing line has stopped. Every second it sits idle, your production schedule slips, and costs go up. The pressure is on you to get it running again, but the cause isn't obvious. You start checking random components, feeling the stress mount as your team looks to you for answers. This chaotic, reactive approach is inefficient and frustrating. I've been in that exact situation many times in my own factory. The uncertainty is the worst part. But through years of hands-on experience, I learned that a reactive scramble is the wrong way. The right way is a calm, systematic process that turns chaos into a logical diagnosis.
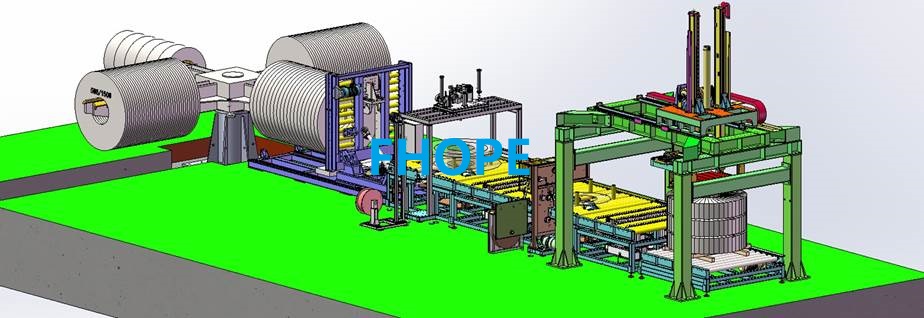
To quickly diagnose coil packing line faults, you must perform systematic checks in a specific order. Start with the Control System, examining HMI alarms, PLC status lights, and sensor functions. Next, inspect the Mechanical Systems for unusual noises, wear, and tension issues. Then, verify the Pneumatic and Hydraulic Systems for correct pressure and leaks. Finally, check the Material Handling for proper product positioning and packing material feed. This methodical sequence isolates problems efficiently.
Knowing what to check is the first step. But understanding how to check each system is what truly separates a fast recovery from a long, expensive shutdown. This is the practical knowledge that keeps a factory profitable. Let's walk through this process step-by-step, so you can build a reliable diagnostic routine for your own team. This is the same logic I used to build my factory's efficiency and the same advice I give to clients like you.
How Do You Troubleshoot the Control System First?
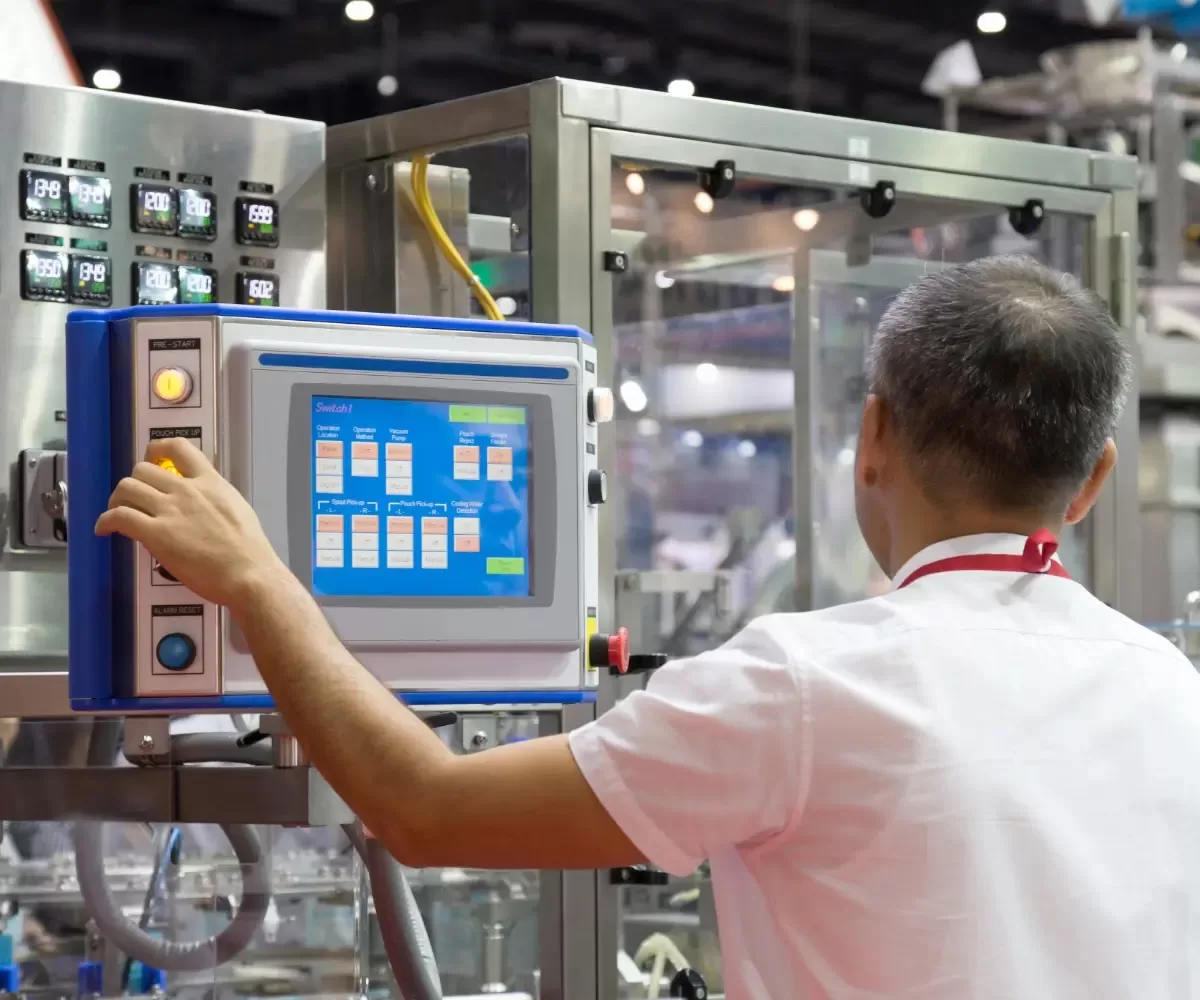
The line stops, but there's no loud bang or visible broken part. Everything looks normal, but nothing is moving. This is a classic sign of a control system issue. These "ghost" problems can be the most frustrating. You might be tempted to start rebooting everything or tracing wires aimlessly, wasting valuable time. Don't fall into that trap. The control system is the brain of your packing line. I always start my diagnosis here. A logical check of the HMI, PLC, and sensors often reveals the root cause in minutes, not hours.
To troubleshoot the control system, first, go to the HMI and check for any active error codes or alarm messages. This is your primary source of information. Next, physically inspect the PLC in the control cabinet and check its status indicator lights (Power, Run, Error) to confirm it is powered and operating correctly. After that, systematically test the critical sensors, like photoelectric and proximity sensors, to ensure they are clean, properly aligned, and receiving power.
Dive Deeper into Control System Checks
Let's break this down into a more detailed, practical process. The control system tells a story about why it stopped. You just need to know how to read it.
1. Human-Machine Interface (HMI)
This screen is your most powerful diagnostic tool. Don't just glance at the main screen. Navigate to the Alarm History or Event Log page. This log records every single fault the machine has registered, in chronological order. The last alarm before the shutdown is your number one clue. An alarm that says "Safety Gate Open" tells you exactly where to look. It prevents you from wasting time checking a motor on the other side of the line. I recall an incident in my own facility. A wrapping line went down, and the operator was absolutely convinced a main drive motor had burned out. He was already preparing to get the spare. I walked over, opened the alarm log on the HMI, and the last fault was "Low Pneumatic Pressure." We walked the line and found a small air hose had popped off a fitting. It was a 30-second fix. The HMI saved us hours of unnecessary mechanical work and the cost of a new motor.
2. Programmable Logic Controller (PLC)
The PLC is the core of the brain. You need to look at the physical unit inside the main electrical cabinet. It has several important status lights. A solid green "RUN" light means the program is executing as it should. A flashing red "FAULT" light indicates a serious problem with the PLC's hardware or program, which is less common but more severe. More useful for daily troubleshooting are the Input/Output (I/O) module lights. Each sensor and switch (input) and each motor and valve (output) is connected to a specific point on these modules, and each point has a tiny light.
- Input Check: If a sensor is supposed to be detecting a coil, its indicator light on the sensor body should be on. The corresponding input light on the PLC I/O module should also be on. If the sensor light is on but the PLC light is off, you have a problem in the wiring between them.
- Output Check: If the PLC is trying to start a conveyor, the corresponding output light should be on. If that light is on but the conveyor motor isn't running, the problem is not the PLC. The problem is downstream in the motor contactor, the overload relay, or the motor itself. This simple check tells you if the problem is logic or power.
3. Sensors
Sensors are the eyes and ears of your machine. They operate in a harsh environment with dust, vibration, and potential impacts, making them a common failure point.
| Sensor Type | Common Problem | Quick Check |
|---|---|---|
| Photoelectric Sensor | Dust, grease, or debris on the lens or reflector. Misalignment. | Wipe the lens and reflector with a clean, soft cloth. Wave your hand in front of the beam path. Watch to see if the small indicator light on the sensor body turns on and off. |
| Proximity Sensor | Metal shavings or grime on the sensor face. Incorrect sensing gap. | Wipe the sensor face clean. Use a piece of metal to test if it activates at the correct distance. Check that its power indicator light is on. |
| Limit Switch | The mechanical arm is stuck or bent. Internal contacts have failed. | Manually move the switch arm back and forth. You should hear and feel a distinct "click." For a definitive test, use a multimeter to check for continuity across the contacts when the switch is pressed. |
What Mechanical Checks Should Be on Your List?
You hear it before you see it: a sudden grinding noise, a high-pitched squeal, or a loud clunk. The line stops moving. This is a clear mechanical failure. These problems can feel intimidating because they often mean physical repairs and part replacements. Your first thought might be about the length of the downtime and whether you have the necessary spares in stock. But a structured mechanical inspection can quickly isolate the broken or worn component. This allows you to assess the damage accurately and plan the repair without wasting time.
For your initial mechanical check, use your ears and eyes before you use your tools. Listen for any abnormal noises and their location. Do a slow walk-around of the entire line, looking for obvious signs of damage like a broken chain or something out of place. Then, systematically check drive systems like chains and belts for proper tension and wear. Inspect rotating components like bearings and rollers for noise, heat, or seizure. Finally, examine the wrapping and strapping heads for any obstructions or misaligned parts.

Dive Deeper into Mechanical Checks
A machine rarely fails without warning. Learning to spot these warnings is a key skill for any manager like Michael, who values reliability. You need to use all your senses.
1. Listen, Look, and Feel
- Listen: When I walk my factory floor, I am always listening. A high-pitched squeal is often the sound of a dry bearing that needs grease, an easy fix that prevents a major failure. A rhythmic clicking noise can point to a stiff link in a drive chain or a damaged tooth on a gear. A loud bang or crunch suggests a more serious failure, like a sheared bolt or a collapsed bearing.
- Look: Visually scan all moving parts. Is a conveyor belt tracking to one side? Are there metal shavings on the floor beneath a gearbox? Are safety guards vibrating more than usual? These are all visual clues.
- Feel: Safety is the top priority here. Never touch moving parts. However, you can safely feel for problems like overheating. Carefully hold your hand near bearing blocks or motor housings. If one is significantly hotter than the others, it is working too hard due to friction or an internal fault. An infrared temperature gun is an excellent, safe tool for this job, allowing you to quantify the heat and track it over time.
2. Key Mechanical Components
Your packing line is a collection of simple machines working together. Focus on the most common failure points.
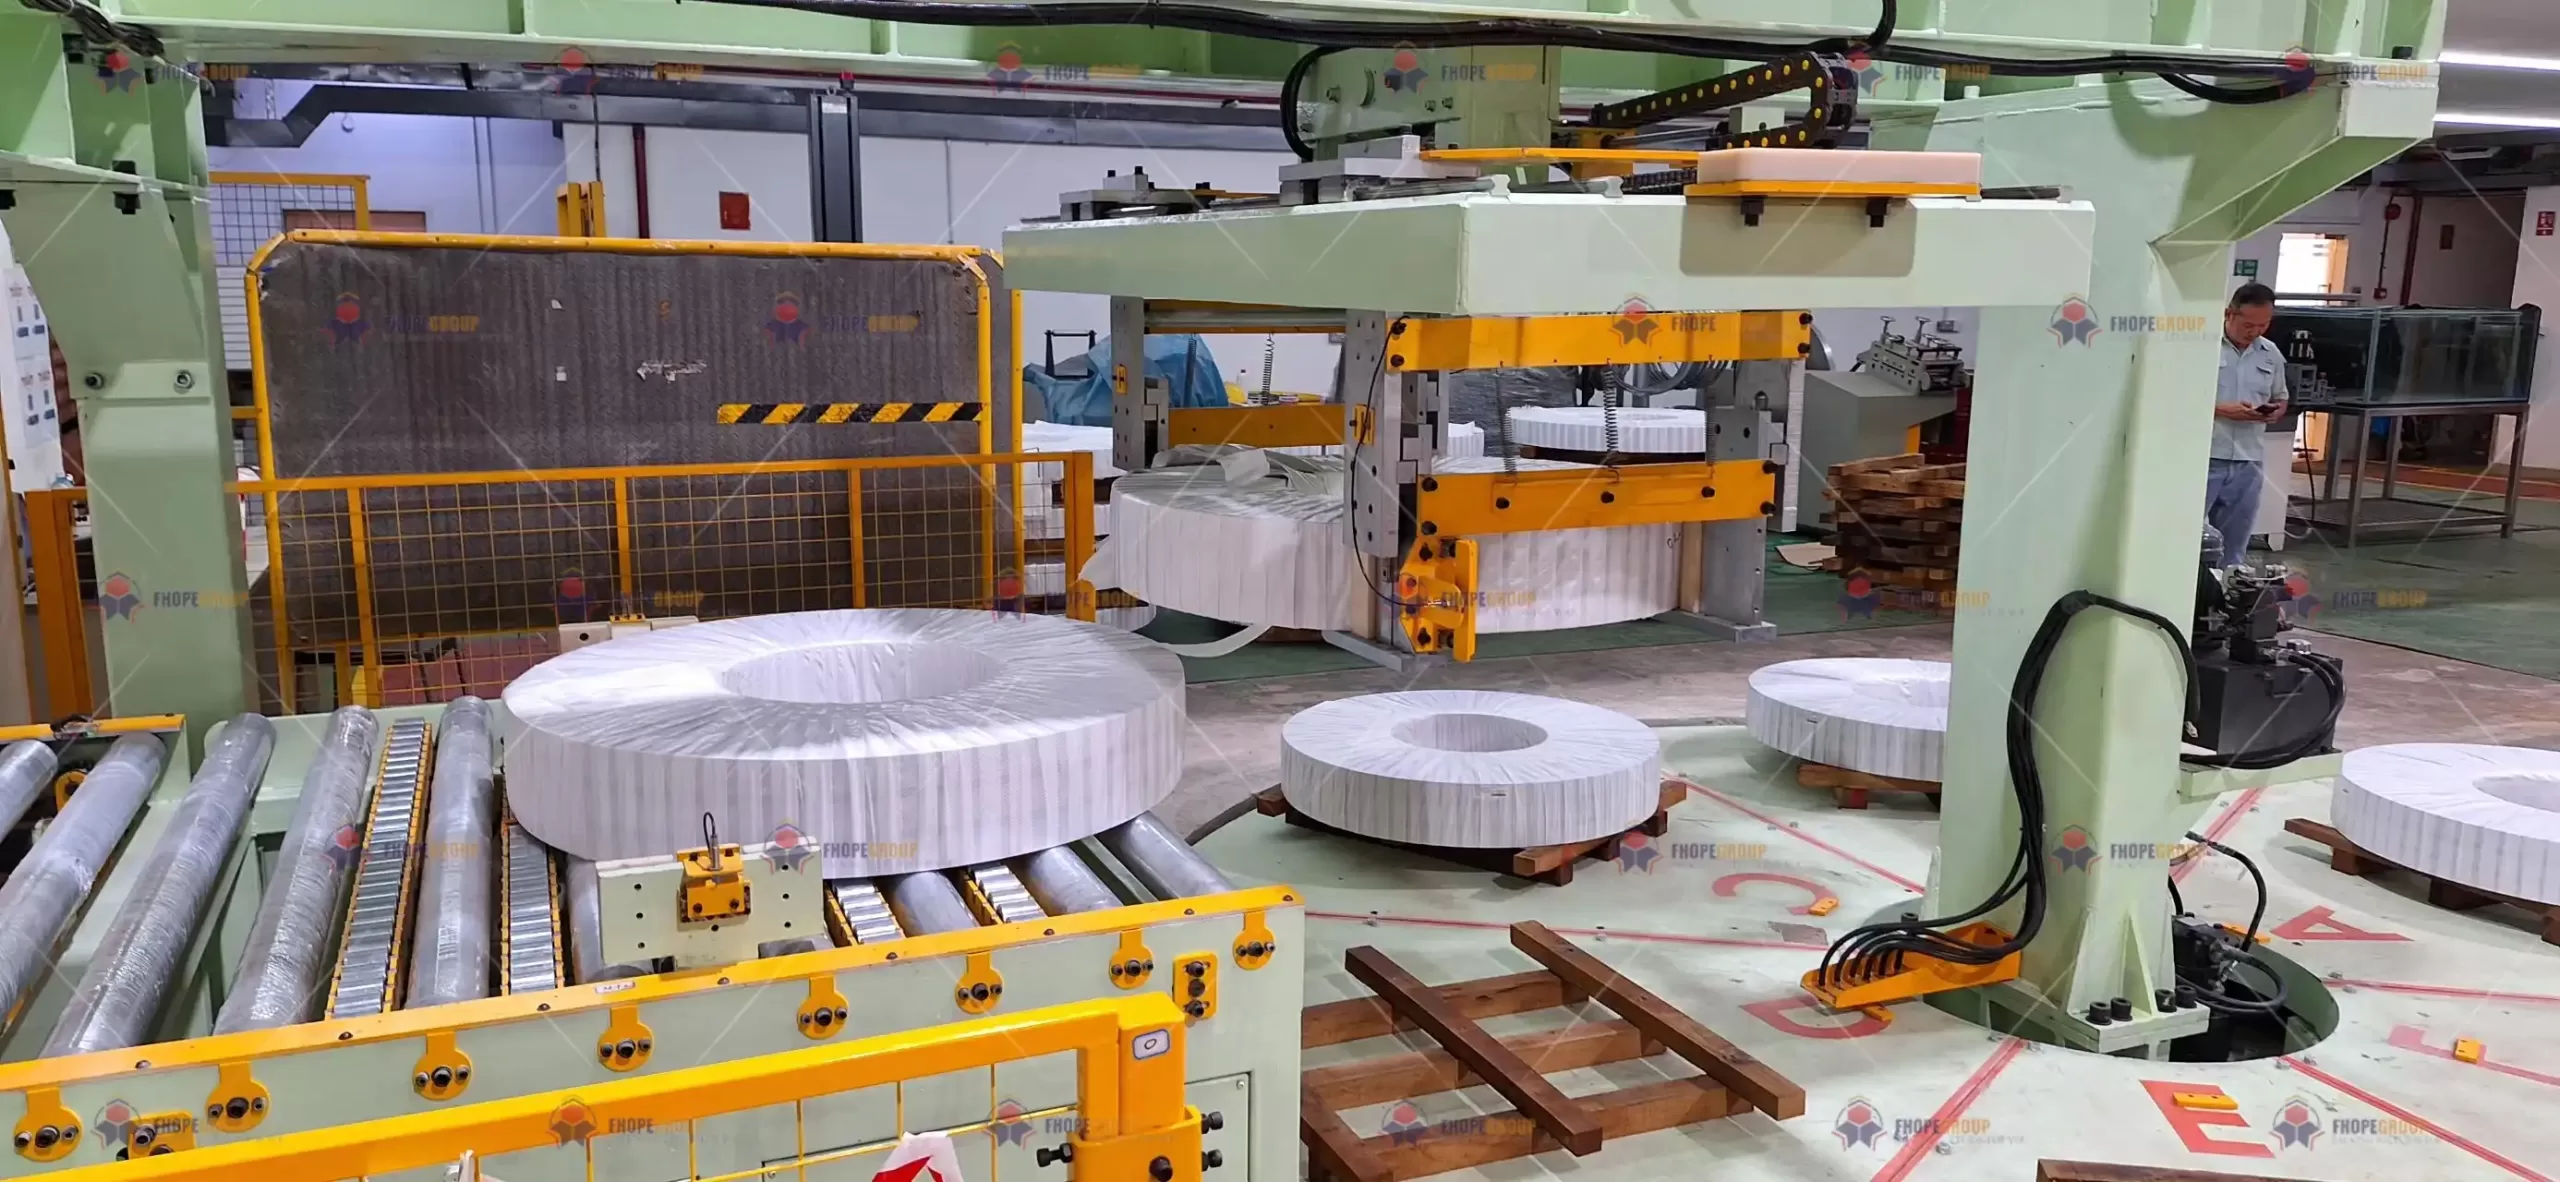
- Drive Systems: These are the muscles of the line. Check chain tension—too loose and it can jump off the sprocket; too tight and it puts excessive strain on motors and bearings. Look at the sprocket teeth. If they look sharp or hooked, they are worn and need to be replaced along with the chain. For belts, look for visible cracks, fraying, or a glazed, shiny surface which indicates slipping.
- Wrapping Ring and Support System: On a through-the-eye wrapper, the main ring must rotate smoothly. Any hesitation, vibration, or grinding noise points to a problem with the support rollers or the main drive. The friction wheels that drive the ring are designed to wear out over time. Check them. Are they worn down? Are they contaminated with oil or grease, causing them to slip instead of grip? I once helped a client who was experiencing inconsistent, loose wraps. They had already replaced the stretch film, thinking it was a quality issue. I asked them to check the friction drive wheels. They found them coated in a fine layer of greasy dust. After they cleaned the wheels with a solvent, the machine's grip was restored, and the wraps were tight and perfect again. It was a simple cleaning task that solved a major quality problem.
| Mechanical Component | What to Check | Why It's Important |
|---|---|---|
| Conveyor Rollers | Do they spin freely? Is there grinding noise? Are any seized? | A single seized roller can tear the protective wrapping on a coil or cause the entire coil to track sideways and jam the line. |
| Drive Chains / Belts | Proper tension, visible wear, proper lubrication. | Prevents slipping, which causes inconsistent timing, and premature failure of expensive motors and gearboxes. |
| Bearings | Unusual noises (grinding, squealing), excessive heat, visible damage. | Bearing failure is a leading cause of major mechanical breakdowns. Early detection prevents catastrophic damage to shafts and housings. |
| Wrapping Ring | Smooth, consistent rotation. Clean drive and support surfaces. | A jerky or slipping ring results in poor quality wraps, which offer less protection and can lead to film breaks, stopping the line. |
Are Your Pneumatic and Hydraulic Systems Causing the Fault?
The machine isn't stopped, but it's not working right. It feels sluggish. A clamp that should hold a coil steady seems weak. A lifting mechanism moves slower than it used to. These subtle performance issues can be tricky to diagnose. The line might still be running, but the poor performance can lead to safety risks or damaged products. It's not a hard stop, but it's a critical problem that is eroding your efficiency. Often, the cause is not a major mechanical part, but the power system behind it. A quick, methodical check of your pneumatic or hydraulic systems can often solve these frustrating performance problems.
To check your pneumatic and hydraulic systems, always start at the power source. For pneumatics, find the main air pressure gauge for the machine and verify it is in the correct operating range. For hydraulics, check the oil level and pressure gauge on the main power pack. From there, hunt for leaks. Walk the line and listen for the distinct hissing of a pneumatic leak or look for visible drips of oil near hydraulic cylinders, hoses, and fittings.

Dive Deeper into Fluid Power Systems
Pneumatics and hydraulics provide the force for all the clamping, pushing, lifting, and positioning actions on your line. When they are underperforming, the entire machine's effectiveness is compromised. For a manager like Michael, who is concerned with safety and efficiency, ensuring these systems are healthy is paramount.
1. Pneumatic Systems (Air Power)
Most packing lines rely heavily on compressed air. It's clean, fast, and relatively simple, but it must be managed correctly.
- Pressure and Air Quality: Your machine is engineered to operate at a specific air pressure, typically around 6-8 bar (90-115 PSI). Find the machine's main Filter-Regulator-Lubricator (FRL) unit. Is the pressure gauge on the regulator set correctly? If the pressure is low, every pneumatic function on the machine will be weak and slow. The problem could be a depleted factory compressor, but more often it's an issue on the machine itself. Next, look at the filter bowl. Is it full of water and grime? This contamination can clog the small passages in solenoid valves, causing them to stick. Drain it regularly.
- Finding Leaks: Air leaks are wasted money and lost performance. The best time to find them is during a quiet period, like a break or shift change. Walk the line and listen carefully for hissing sounds. To pinpoint a suspected leak, spray a solution of soapy water on the fitting or hose. If it bubbles, you've found your leak. A tiny leak on the fitting of a clamping cylinder can be the reason a coil isn't held securely, leading to a poor-quality wrap and potential safety issues.
2. Hydraulic Systems (Oil Power)
Hydraulics are used for heavy-duty tasks like lifting and tilting large, heavy coils. They provide immense power but require careful maintenance.
- Fluid Level and Condition: This is the most basic and most important check. Look at the sight glass on the hydraulic reservoir. Is the oil level within the recommended range? Low oil can cause the pump to ingest air, leading to pump damage and loss of power. Check the oil's temperature. Overheating oil breaks down and loses its ability to lubricate and transfer power effectively. Finally, is the oil clean? Contaminated oil acts like liquid sandpaper, destroying expensive pumps and valves from the inside out.
- Leaks and Pressure: I once consulted for a steel processor whose heavy coil tilter was getting progressively slower. Their maintenance team was convinced the main hydraulic pump was failing and was preparing for a very expensive replacement. I asked them to do one last thorough check for leaks. They found a large, but well-hidden, hydraulic leak from a return hose underneath the machine that was dripping into a collection pit. They replaced one inexpensive hose, topped off the fluid, and the tilter's speed and power returned to 100%. A five-minute check saved them thousands of dollars. Always look for puddles or drips and trace them back to the source.
| System | Key Check | Tool / Method | Potential Fault if Ignored |
|---|---|---|---|
| Pneumatic | Air Pressure | Check the machine's main regulator gauge. | Sluggish movements, weak clamping force, inconsistent operation. |
| Pneumatic | Air Leaks | Listen for hissing noises; use a soapy water spray. | Constant loss of pressure, forces air compressor to run excessively. |
| Hydraulic | Oil Level & Condition | Check the sight glass and oil color/clarity. | Pump damage from cavitation, system overheating, premature component wear. |
| Hydraulic | Oil Leaks | Visual inspection for drips, puddles, or wet hoses. | Loss of lifting/clamping power, potential for major failure, safety and environmental hazard. |
How Does Material Handling Affect Line Reliability?
The line keeps stopping, but for small, annoying reasons. The wrapping film breaks again. A coil gets jammed entering the wrapping station. The final wrap is crooked and doesn't cover the edges properly. This is incredibly frustrating for operators and devastating for your production numbers. It feels like you are fighting the machine all day long. In these situations, the machine itself is often not the problem. The real culprit is how the materials—both your product and the packing materials—are being introduced and handled by the system. Perfecting your material handling process is the key to achieving a smooth, non-stop, automated operation.
To diagnose material handling faults, always check the path of the packing material first. Make sure the roll of film, paper, or VCI is loaded correctly and that the tension settings are appropriate for the material you are using. After confirming the packing material is correct, verify that the steel coil itself is being positioned accurately and consistently on the conveyor or shuttle. A slight misalignment of the coil is one of the most common reasons for jams and poor-quality wrapping.
Dive Deeper into Material Handling
This is the area that is most often overlooked. It's easy to blame a complex machine for a fault, but many times, the solution lies in a simple adjustment to the process flow. Your packing line is a complete system; the machine is just one part of that system. For a manager like Michael, who is struggling with product damage and efficiency bottlenecks, optimizing material handling will provide a huge return.
1. Packing Material Feed
Think of this like threading a sewing machine. If the thread path is wrong or the tension is off, it will never sew correctly.
- Material Path: Is the roll of packing material loaded correctly onto the dispenser? Is it threaded through every single roller, dancer arm, and guide exactly as shown in the machine's manual? I have seen operators take shortcuts in the threading path to save a few seconds, but it always leads to trouble later with tracking issues or material wrinkling.
- Tension Control: This is perhaps the single most critical setting for wrapping quality and reliability. If the tension is too low, the wrap will be loose and offer no real protection to the coil. If the tension is too high, the stretch film will constantly break, especially as it goes around the sharp corners of a steel coil. This forces constant operator intervention and kills your uptime. The tension system, whether it's a simple mechanical brake or a sophisticated powered pre-stretch unit, must be set correctly for the specific film you are using and the product you are wrapping.
2. Product (Coil) Positioning
The consistency of how your product is presented to the machine is fundamental.
- Centering is Everything: The steel coil must be placed in the precise center of the wrapping ring's opening. If it's loaded even slightly off-center, the wrap will be uneven. One side of the coil will have too much film, and the other side will have too little, leaving edges exposed. This is a common problem with manual loading via crane or forklift. Proper operator training is essential, and physical guides or automated coil centering systems can eliminate this problem entirely.
- Consistent Entry and Exit: The coil must enter the machine smoothly and stop in the exact same position every single time. A photoelectric sensor that is dirty or has been bumped slightly out of alignment can cause the coil to stop a few centimeters short of or past its target. This can lead to the wrapping cycle starting at the wrong time, causing a messy wrap or a machine jam. For a factory manager dealing with damaged coil edges, this is a critical point. A coil that stops in the wrong position can easily be scraped by a conveyor guide or the machine frame itself. A smooth, centered, and repeatable entry process is the foundation for preventing this type of product damage.
| Handling Area | Common Issue | Solution | Impact on Reliability |
|---|---|---|---|
| Packing Material | Incorrect Film Tension | Calibrate and adjust the film brake or pre-stretch motor settings. | Prevents constant film breaks (too high) or loose, ineffective wrapping (too low), which both stop production. |
| Packing Material | Incorrect Threading Path | Re-thread the material exactly according to the diagram in the machine manual. | Ensures smooth, wrinkle-free film delivery and prevents jams within the dispensing carriage. |
| Product Positioning | Off-Center Coil Loading | Implement clear visual guides for operators, or invest in an automated coil car with centering capabilities. | Guarantees an even, fully protective wrap and prevents damage to coil edges from contact with the machine. |
| Product Entry | Inconsistent Stopping Position | Regularly clean and verify the alignment of all product position sensors. Check conveyor speed for consistency. | Prevents jams, ensures the wrapping cycle starts correctly, and protects the product and machine from collision damage. |
Conclusion
A systematic approach transforms chaotic downtime into a predictable diagnostic process. These checks empower you to find and fix faults quickly, boosting both reliability and your bottom line.


